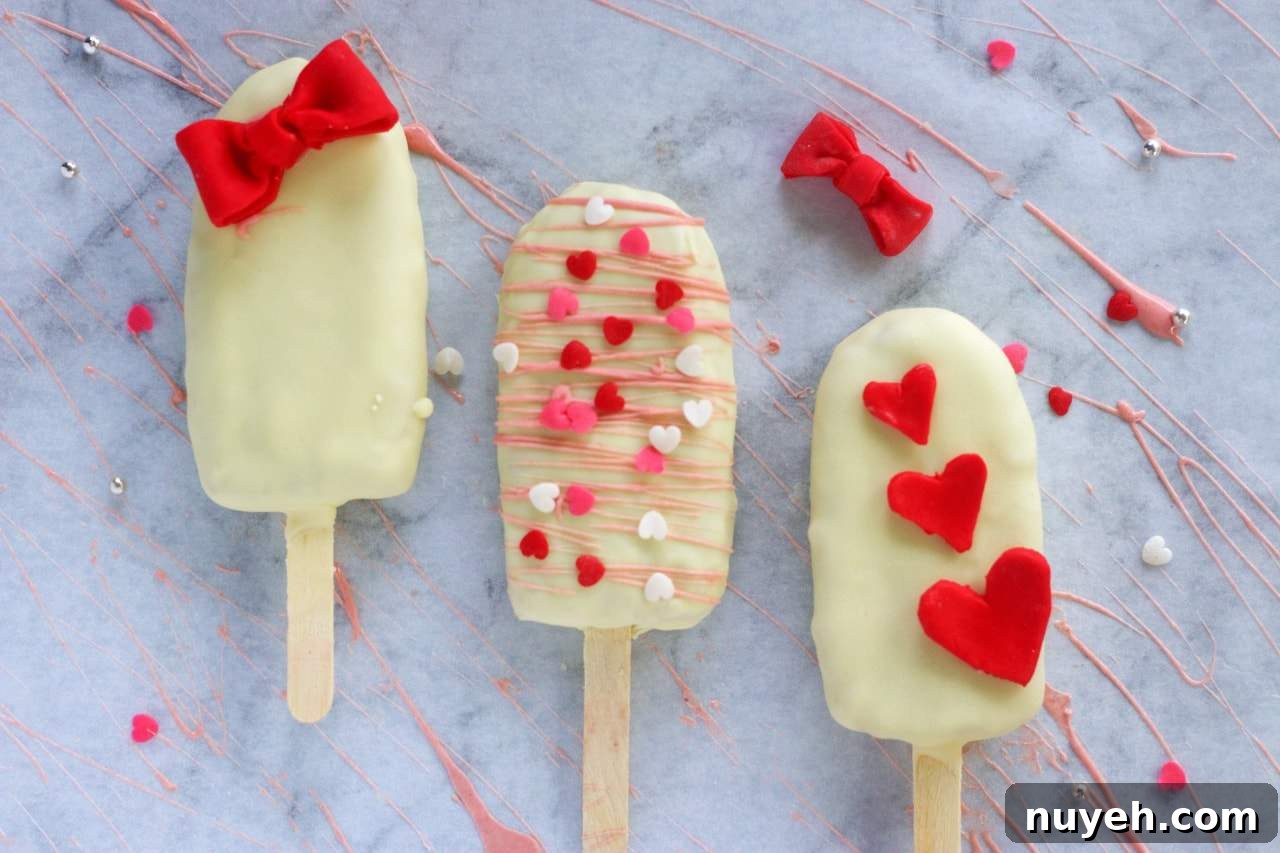
Cake Popsicles are a delightful and trendy way to transform cake into a fun, bite-sized treat. This guide offers a clear, step-by-step tutorial for creating DIY cake popsicles without molds — perfect for kids’ birthday parties, Valentine’s treats, or anytime you want a playful dessert.
These cake popsicles are essentially shaped cake crumbs mixed with frosting, frozen, dipped in chocolate, and decorated. They are easy to make, highly customizable, and require no special equipment if you prefer a rustic look. I love sharing these kinds of creative recipes because they combine simple techniques with playful presentation — and they are a hit with both kids and adults.
If you enjoy browsing recipe ideas on Pinterest or Instagram you’ve likely seen variations of cake popsicles in themes like Disney characters, farm animals, or elegant monograms. The beauty of this recipe is how adaptable it is: use any cake and any frosting you like, then decorate to match any celebration.
Simple designs often have the biggest impact. Whether you’re trying this for fun, gifting for a special event, or testing a new idea for a small order, these cake popsicles let you experiment with flavor and decoration while minimizing waste.
Cake Popsicles Tutorial
Ingredients
- 1 (6-inch) cake (any flavor; see notes)
- 1/4 cup frosting of your choice
- 3 ice-cream sticks
- 450 g compound chocolate (milk, dark or white)
- Sprinkles, marzipan, or fondant for decorations
Instructions
- Crumble the cooled cake into very fine crumbs. For a smoother look, trim the cake’s top and bottom crusts before crumbling.
- Add frosting in small amounts and mix until the crumbs come together into a dough-like consistency. Pinch a small piece to test: it should hold its shape without being sticky.
- Divide the cake dough evenly. I found that three generous scoops per popsicle gave the size I wanted, but you can adjust to taste.
- Shape each portion into a popsicle form using a reference mold or a template. Press and refine the edges so the shape is compact and smooth.
- Place shaped popsicles on a tray, then freeze for 30 minutes to 1 hour so they firm up.
- Dip the tips of the ice-cream sticks in melted chocolate and insert them into the frozen cake shapes. Return to the freezer while you prepare the coating.
- Melt the compound chocolate using a bain-marie or a gentle microwave method. Keep the chocolate warm enough to coat in one dip.
- Dip each frozen popsicle straight into the melted chocolate, covering it completely. Allow excess chocolate to drip off. The coating will set quickly on the cold surface.
- If you plan to add sprinkles, apply them immediately after dipping while the chocolate is still wet. For marzipan or fondant decorations, wait for the coating to solidify and then attach decorations with a small dab of chocolate or buttercream.
- Let finished cake popsicles set fully before serving. Store refrigerated until serving for best texture.
Flavors and Variations
Use any cake flavor as the base: vanilla, chocolate, red velvet, coffee, pistachio, or almond. For frosting choose whipped cream, buttercream, ganache, or any flavored frosting you prefer. The chocolate coating can be milk, dark or white compound chocolate. Finish with sprinkles, fondant shapes, marzipan, or edible paint for themes like baby showers, graduations, birthdays, or seasonal decorations.
Tips
- Add frosting gradually — a little goes a long way. Too much will make the mixture too sticky to shape.
- Work with chilled cake dough to make shaping easier. If the mixture becomes soft, return it to the fridge for a short time.
- Use enough melted chocolate to dip the popsicle in one go; otherwise the coating may appear thin or uneven.
- Because the cake popsicles are cold, the coating sets quickly. Apply sprinkles immediately after dipping if you want them to stick.
Notes
1. Any cake works — even store-bought or boxed mixes. The original recipe used a halved eggless vanilla cake baked in a 6-inch round.
2. For whipped cream frosting, combine 1/4 cup whipping cream, 2 tbsp icing sugar, and a drop of vanilla, then whip to stiff peaks. Add a tablespoon at a time to the cake crumbs until the desired consistency forms.
3. I recommend preparing at least 400g of melted chocolate for larger popsicles to ensure full, smooth coverage in a single dip.
Conclusion
If you enjoy the satisfying crunch of a chocolate-covered ice cream bar, you’ll appreciate cake popsicles — they recreate that crackling chocolate shell while delivering your favorite cake flavors inside. For a professional, uniform finish in commercial orders, consider using a popsicle mold. For home use, these hands-on popsicles are quick, creative, and endlessly customizable.
If you try these cake popsicles, enjoy the process and be creative with decorations. I’ll see you soon with another recipe. Until then, hugs — Sushma